DTN AP Mobile
We have now added the ability to add fields via the iOS app. You will need to be online with an active Internet connection for this feature to work.
| 1. Click on the + Add a Field button from the Grower list. | 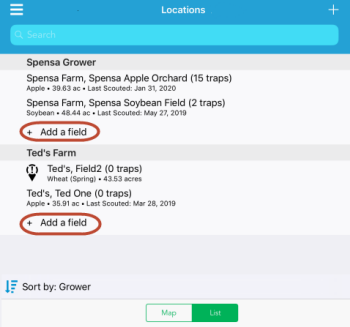 |
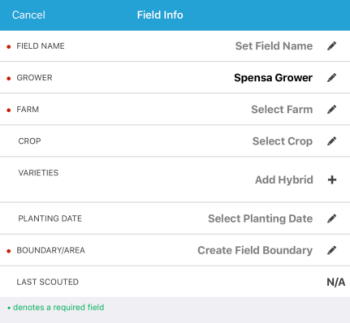
| 2. Fill out as much of the information as you can for the new field.
To add new information, click the pencil icon next to each field to edit. |
 |
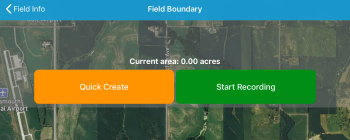
| 3. When you are ready to create the field boundary, click the pencil icon for Boundary/Area
You will have two options to create a new field, Quick Create and Start Recording
|
 |
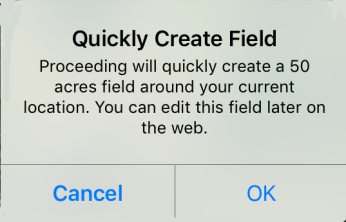
| 4. After clicking the Quick Create button, you will receive the notification that a 50 acre field will be created around your current GPS location.
You can edit this later via the web app. |
 |
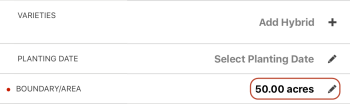
| 5. After creating the field boundary, you will see 50.00 acres listed under the Boundary/Area section
Once you are ready, click the Save button and the new field will be created with the information you specified |
 |
| 6. Once the Field is done saving, you will land on the field, ready to start scouting or trapping. |  |
Some of our users have reported issues using the default camera app found on their device. One solution is to install OpenCamera from your device’s app store and utilize it during scouting trips.
When taking a picture within the DTN AP app, you will be prompted to select a camera app:
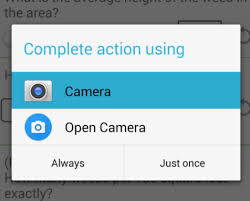
If you would like to always have OpenCamera as your default choice, select it on the screen and choose the Always option.
From the Apple Store, search DTN AP.
Click DTN AP to open the install page.

Click Install.
Click Open once the install has finished.
Enter your DTN AP username and password.
| 1. Click on the Menu Button and select Reports | 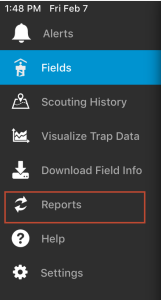 |
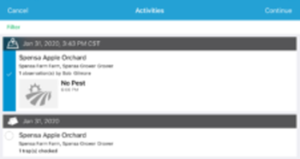
| 2. Click on the Report button in the upper right of the screen.
3. Check off the trips (scouting and trapping) you would like to include in your report. 4. Click the Continue button in the upper right (where the Report button was). |
 |
| 5. Type in any Overall Comments and Activity comments you would like to include in the report and then click the Continue button. | 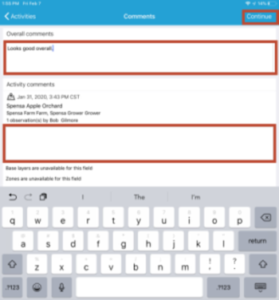 |
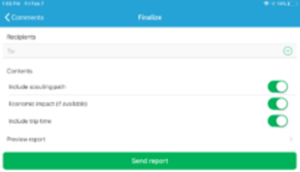
| 6. Add the Recipients you want to send your report to by typing in their e-mail address and then press the Return button on the keyboard.
NOTE: You can add several recipients to a report. |
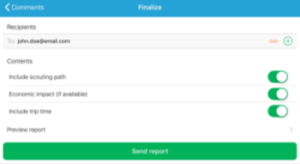 |
| 7. Toggle the Include scouting path and Economic impact (if available) options to their desired settings.
8. Click the Preview report button to double-check and make sure the report is setup as expected. 9. Click Send report. |
 |
| 10. The app will report if the trip is sent successfully. |  |
| 1. Click on the Menu button and select Download Field Info. | 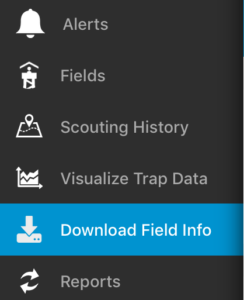 |
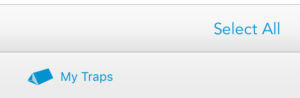
| 2. Click on the My Traps button on the bottom.
3. Click the Select All button on the bottom |
 |
| 4. Click the Download button at the top |  |
| 5. Wait a few moments and all of your traps will download to the iOS device. A timestamp will appear to let you know the last time the traps were downloaded for offline use. | 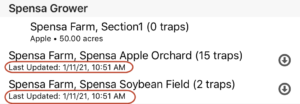 |
| 1.In the Grower List, click on a Field you want to move traps on. |  |
| 2. On the bottom tab selector, click on the Traps icon to show the list of your traps on the currently selected Field. |  |
| 3. Click on the List view option.
4. Click on the Trap you want to move. |
 |
| 5. Click the Edit button in the upper-right.
|
 |
| 6. Click on the Trap Location icon to edit the Trap’s current location. |  |
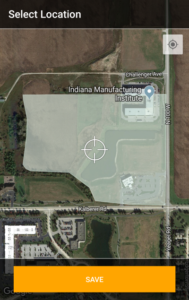
| 7a. You can either drag the Trap to the new location by pressing your finger on the map and moving the crosshair to the new location.
7b. You can click the GPS locator icon (lower-left) to auto-locate the trap based on your current GPS coordinates. 8. Click Done when you have selected the new Trap location. 9. Click the Save button when you are ready to save the new Trap location. |
 |
If you are experiencing data not syncing with our DTN AP servers, you can re-sync your iOS device by following the steps below.
| 1. Click on the Menu button. |  |
| 2. Click on Settings. | 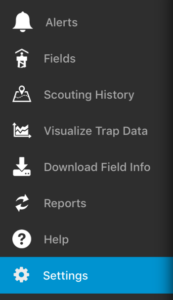 |
| 3. Click Sync All Information. |  |
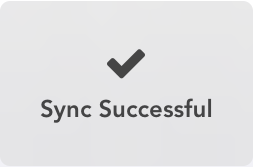
| 4. Wait for the syncing process to complete.
|
 |
To get the latest information in a particular area of the DTN AP app, you will need to initiate a pull-to-refresh.
- Scroll to the top of the screen on your mobile device.
- Slide your finger down the screen until you see the refresh icon.

- Release your finger and the screen will refresh.
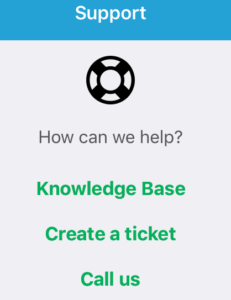
| 1. Click on Help from the menu | 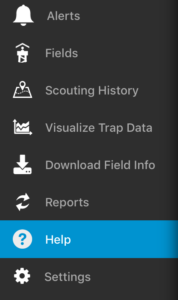 |
| 2. If you are on a phone, you can click on Call us to call the DTN AP Support team.
3. If you want to submit a helpdesk ticket, click Create a Ticket. |
 |
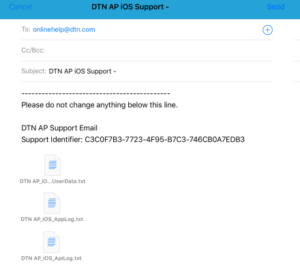
| 4. Enter a description of your question or problem, and then click Send. We will respond to your ticket as soon as possible. Responses will appear in the email address associated with your account.
Note: Screenshots are helpful to the support team when trying to troubleshoot an issue. You can attach a screenshot to the ticket by clicking the Attachment icon.
|
|
| 1. Click on Scouting History from the menu. | 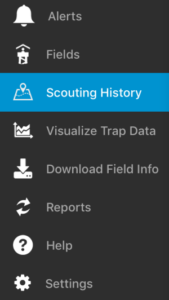 |
| 2. Select the trip you would like to continue. | 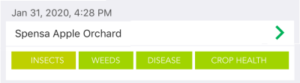 |
| 3. Click the Continue button in the upper-right hand corner of the screen.
4. Continue scouting on the selected trip. |
 |
When a scouting trip is highlighted in yellow, it means the mobile application has yet to sync the data with the DTN AP server. Once the data has been synced, the scouting trip will return to its normal color.
To force the mobile application to sync, pull down at the top of the Scouting History screen and wait until the update icon appears. This should refresh the history.